Advanced Weathering Techniques for Realistic Rolling Stock
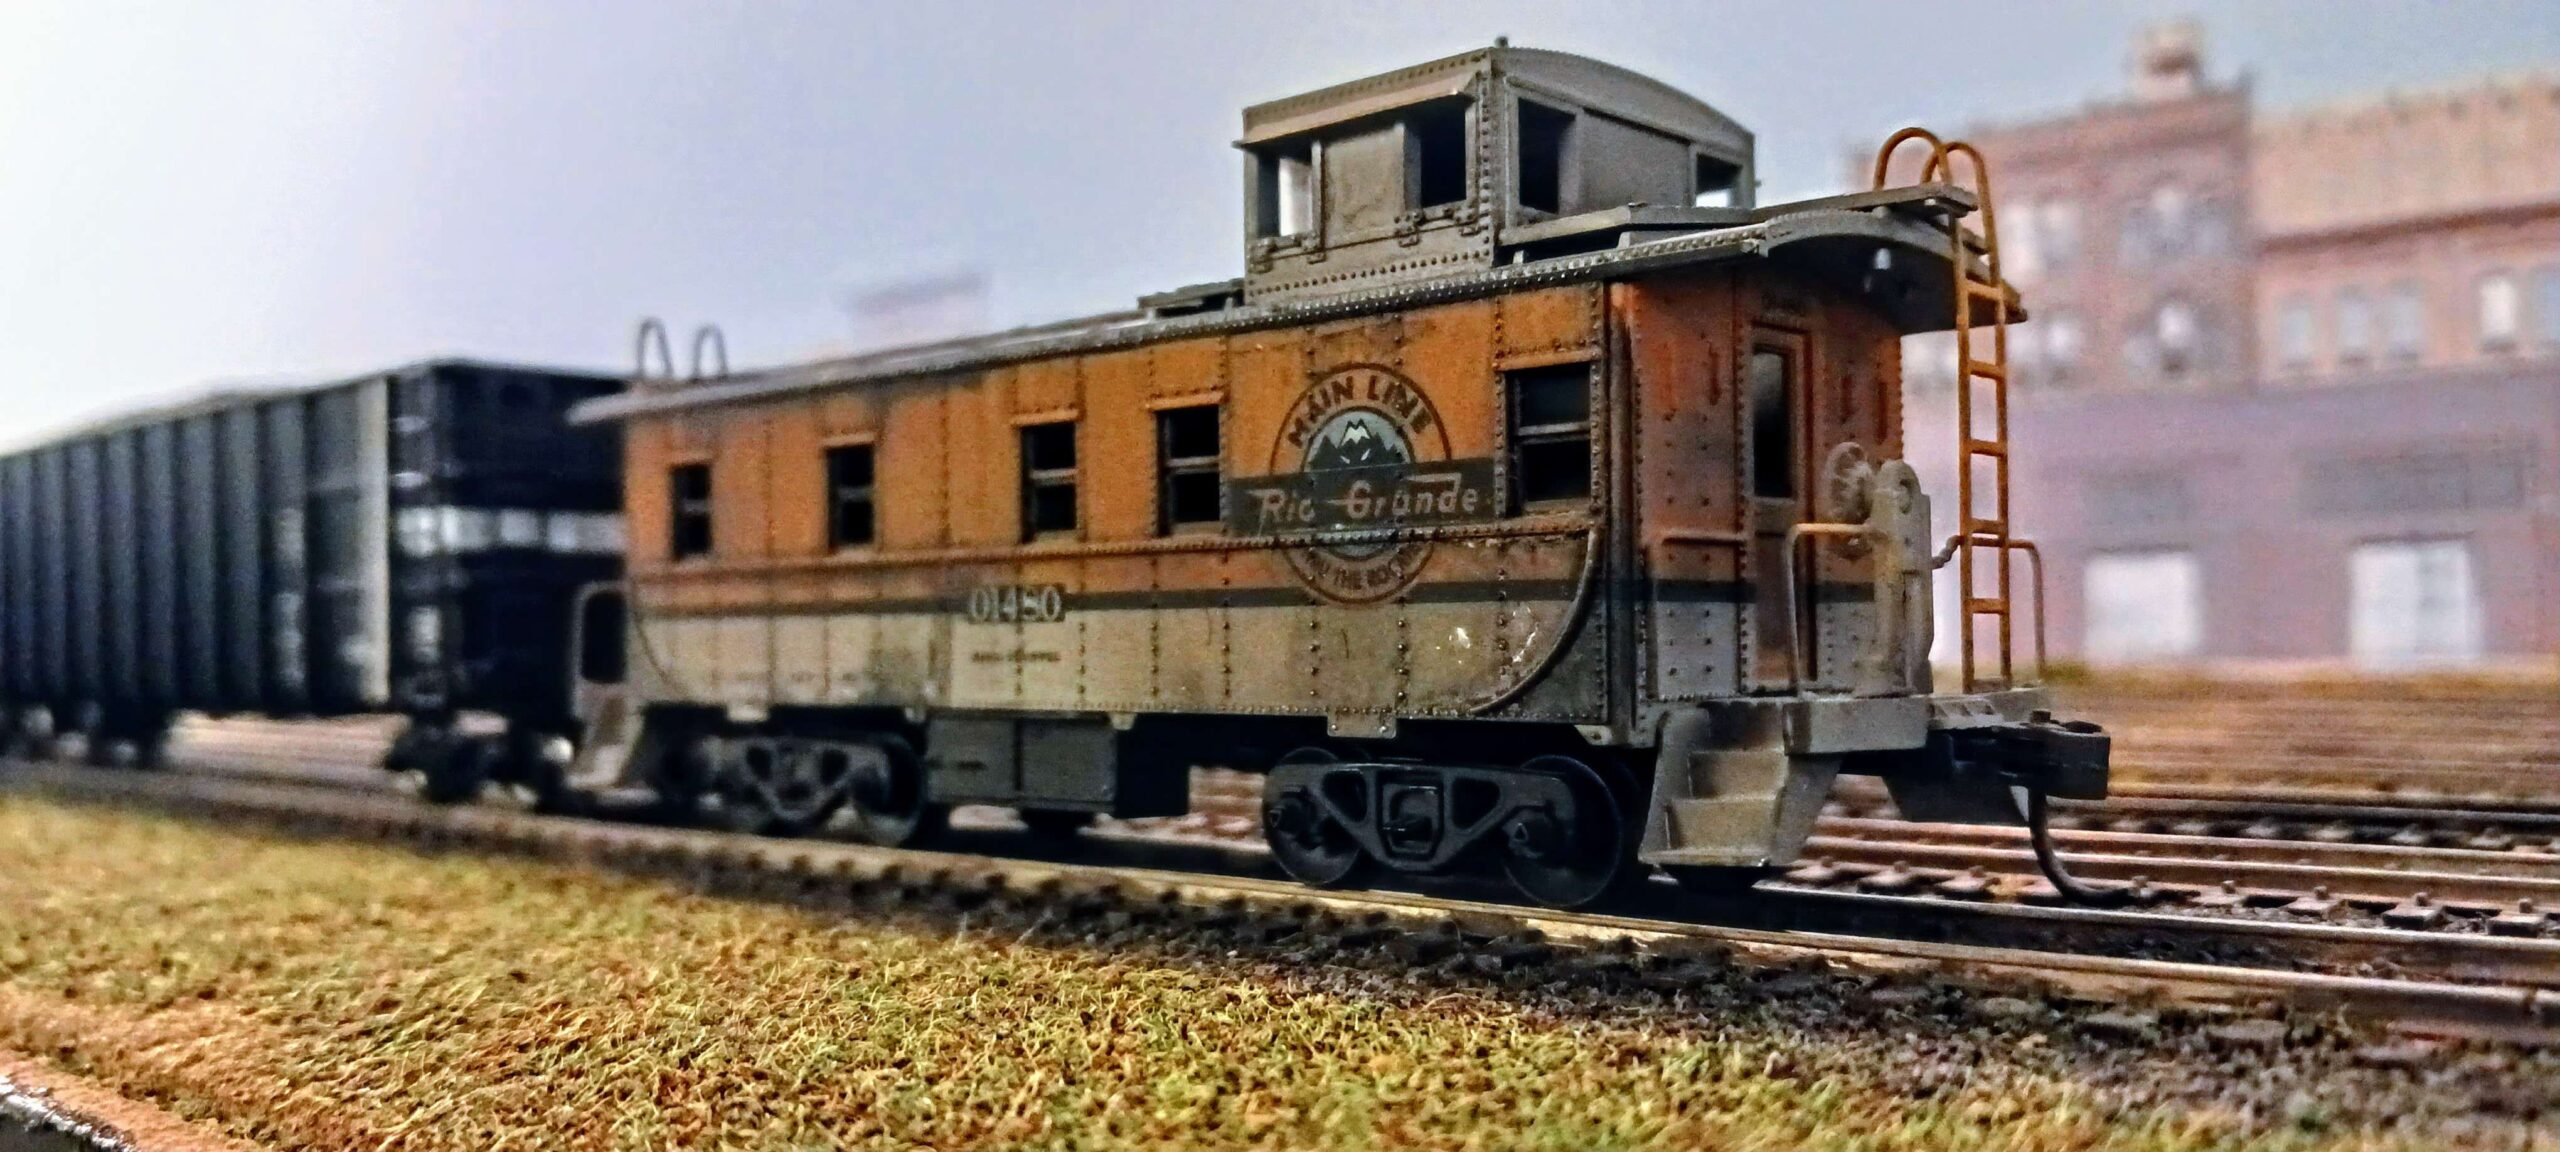
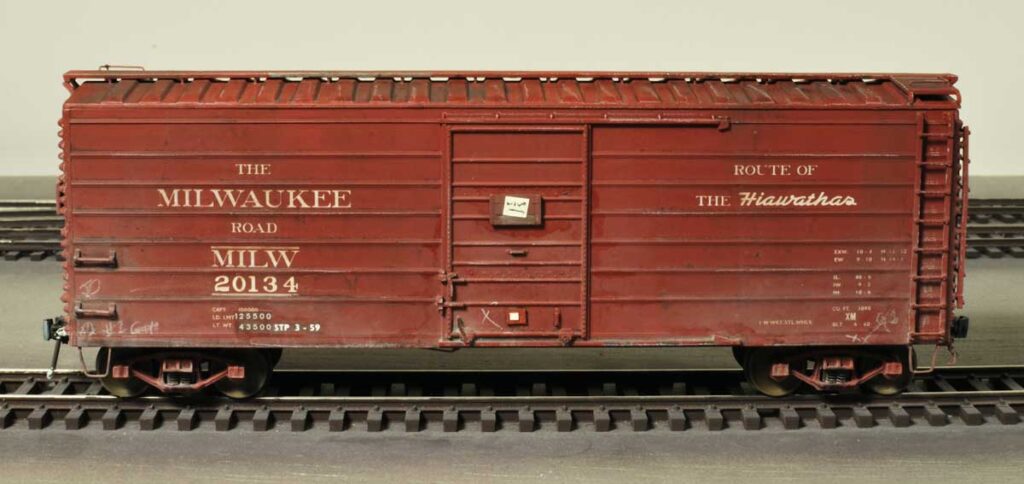
To truly bring an HO layout to life, your rolling stock needs realistic wear and tear. Weathering adds authenticity by simulating dirt, rust, grime, and faded paint – effects you see on real rail equipment. Because, let’s face it, real trains are rarely spotless. By carefully adding subtle layers of weathering, you make your models look lived-in and believable, telling a story of age and use.
Airbrushing for Grime and Fading
Airbrushing is the quickest way to lay down a base coat of dirt or fading. Use a good dual-action airbrush (for example, an Iwata Eclipse HP-CS or Paasche Talon TG-SET) and thin water-based paints heavily (often ~1:9 paint:thinner in isopropyl alcohol). Build up color in multiple light layers rather than one heavy coat. For example, first a model with a thinned white to fade the base color, then dust on a brown tone in vertical streaks to simulate grime. After spraying, use a cotton swab and a drop of Windex to lift off paint from raised edges – this “reverse weathering” highlights ribbing and posts just as real dirt would be less on edges.
- Airbrush tips: Work close and slow at low pressure (around 15–20 psi) on HO cars, since details are tiny. Keep the gun upright and parallel to panel lines for realistic drips. Use a moisture trap and regulator on your compressor (even with acrylics) and a pressure gauge so you can fine-tune flow. Gravity-feed, double-action brushes are preferred (Iwata and Paasche are top brands).
- Products: Consider Badger Modelflex Weathering Colors (water-based weathering paints), or Vallejo Model Color rust and streak shades. Thinned Vallejo Burnt Iron or Tamiya Weathering Stains can simulate rusty panels. (One popular set is the Vallejo Weathering Effects – Rust, Stains & Streaking acrylic paint set.)
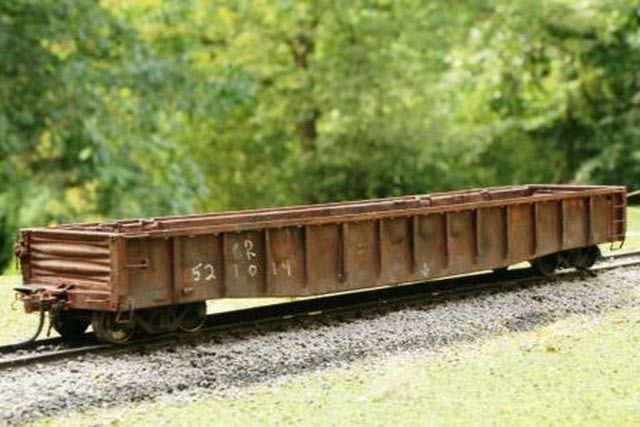
Rust, Streaks and Oil Weathering Effects
To replicate rust and oil spills, you can airbrush or brush on specialized paints and washes. For rust, use acrylic rust-colored paints or pigment powders. For example, after base-coating, apply vallejo weathering pigments or dry powder in brown/orange shades (see below) to corners or seams. You can also paint thin lines of Tamiya or Vallejo rust shades, then blur them with a damp brush.
For grease and oil streaks, oils are ideal. Put a tiny dot of black or dark brown oil paint (Winsor & Newton Artists’ Oil, for example) where oil would leak (like around couplers or fuel caps), then drag a damp brush or cotton swab downward to streak it. Keep these streaks vertical and parallel to each other, matching wheel-gauge spacing. The key here is to keep the streaks vertical. Use lighter greys or whites similarly for sun-fading along roof ridges or panels.
- Chipping: For chipped paint, an advanced method is hairspray or acrylic chipping fluid under the final coat. Apply it, then topcoat and scrub areas with a stiff brush or toothpick to expose the base color, mimicking worn-through paint. This reveals “metal” or primer beneath in spots.
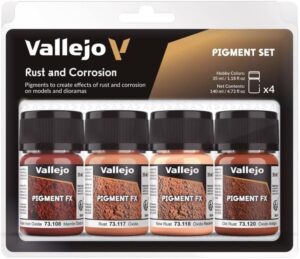
- Products: Vallejo Pigment FX – Rust & Corrosion Effect pigment set (4x35ml) lets you brush on realistic rust dust and then fix it with a matte medium. The Tamiya Weathering Master sets (e.g. Set C: rust and metal powders) are travel-friendly kits with palettes and applicators that are easy to use on small models. Raw PanPastel Rust & Earth artist pastels are also popular for subtle rust and dust effects.
Dry Brushing and Accent Painting
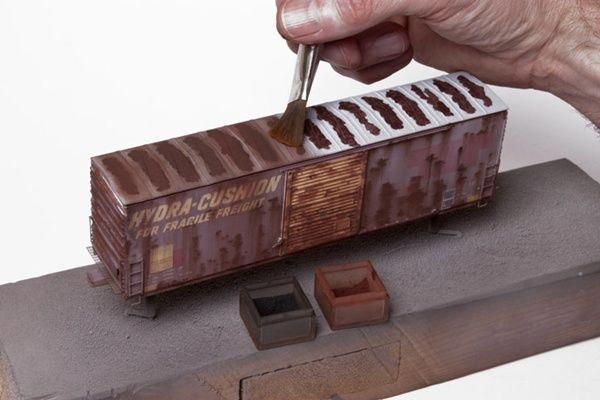
Dry brushing highlights raised details and edges. Pick a flat or tiny round brush, load it with a rusty brown, grey, or dusty tan paint, then wipe almost all of it off on paper. Gently drag the barely-wet brush along panel edges, grilles, rivets or mold lines. Only the tip of the bristles should touch the model, leaving a fine dry stroke. This catches high points while leaving recesses untouched, simulating sun-bleaching or edge wear. Keep brush strokes straight and parallel to surface contours – avoid swirling. (On roofs, brush along the seams; on side sills, along the length.) This is an easy, controlled way to fade paint or add chalky dust.
- Technique: After loading and dry-wiping the brush, apply a second color (lighter gray or white) for sun-fade or chalk bloom. Small splotches of rust color around roof vents or stains at the base of pipes can be gently brushed out vertically.
- Products: Standard acrylics (Model Master, Vallejo, Tamiya) work well for dry brushing. A good sable or synthetic brush is key. (The image above shows a brush being used on a roof to simulate fading.)
Pigment Powders & Chalks
Pigment powders simulate airborne dirt, dust, and mud splatters. Use a soft brush or fingertip to apply fine earth-toned powders where dirt accumulates (below handrails, in panel gaps, on trucks and wheels). For chalky weathering, ground artist pastels work similarly. Brush on Pinwash or fixative to set pigments once arranged.
- Techniques: You can mix pigments with alcohol or acrylic medium and paint them on (great for streaks or mud), or sprinkle/dust them dry for subtle fallout. A thicker mud effect can be made by mixing pigment with diluted matte medium or plaster, applying on wheels and underframe, then scraping off excess while wet (leaving heavier build-up around wheels).
- Products: Popular products include Vallejo Pigment FX sets – e.g. Dust & Dirt and Rust & Corrosion kits – and AK Interactive and MIG Jimenez pigments (available in hobby stores). The PanPastel Rust & Earth Set (7-color cake pastels) are highly rated for weathering. For quick dab-and-blend weathering, Tamiya’s Weathering Master pastel sets or any portable pigment set can be handy on a workbench.
Taking Weathering to the Next Level
- Layering & Filters: Don’t stop at one technique. Layer effects – for example, chalk dust over dried mud, or a light airbrush wash under dry-brush highlights. Use pale tinted washes or hairspray filters to uniformly fade colors (e.g. a sepia wash for grime or a white filter for sun-bleach). Each thin layer builds realism.
- Environmental Context: Consider the scene. A desert layout might use tan dust and faded paint, while an industrial area might have heavy black soot around vents. Apply pigments accordingly (e.g. reddish-brown dust for clay regions, fine coal-black near engines). Simulate puddles of mud or rust streaks under handbrakes after rain.
- Prototype Research: Study photos of the real railroad or era you’re modeling. Note where rust typically forms (roof walks, brake gear), where paint is sun-faded, and where streaks trail down. Modelers advise: “Study real trains – observe where and how they weather”. Start very lightly (“less is more”) and compare as you go. Keeping reference photos on hand is invaluable.
- Mix It Up: Combine media. For example, after airbrushing a grime wash, dry-brush highlighting, then pigment dust for settlement. Or airbrush oil-rocking on top of acrylic layers. Experiment on scrap pieces first.
Video Tutorials and Weathering Time-Lapses
For step-by-step demos and inspiration, check out these YouTube tutorials and time-lapses:
- HO Covered Hopper Weathering Tutorial (Panzermeister36) – covers rust, paint patching, and graffiti on a covered hopper.
- HO Covered Hopper Weathering (Andy Dorsch) – “No powders, no pastels” oil/acrylic method (and builds realistic rust).
- Time-lapse: Weathering HO Locomotive – shows an SD70M getting weathered in fast-forward.
- ARCO H0 Freight Car Weathering – layered techniques on an ARCO boxcar.
Conclusion
Advanced weathering is all about subtle layering and reference. Don’t be afraid to experiment – try different pigments, oils, and airbrush mixes until the effect matches reality. Share your results and techniques with the hobby community (forums, groups, social media); feedback and fresh eyes often spark new ideas. Above all, practice on a test car or spare kit: build up effects slowly. With patience and these techniques, your HO freight cars and locomotives will blend seamlessly into your layout, enhancing the authenticity of your miniature world. Good luck, and have fun weathering!